
For a fashion founder, receiving the first garment sample can feel like a major milestone. But a sample is more than a preview of how your design will look. It is an opportunity to check whether the design, measurements, fabric, construction, finishing and functionality are aligned before moving into bulk production.
This stage of the fashion sampling process is where many potential issues can be identified and corrected. Approving a sample too quickly can result in incorrect fit, construction problems, material inconsistencies, unwanted design variations or production delays.
So, what exactly should you check before approving a clothing sample? Here is a practical garment sample approval checklist for fashion founders.
What Is Fashion Sampling?
Fashion sampling is the process of developing and reviewing a physical garment before bulk production. Depending on the product and project, the process may involve creating a sample, reviewing its fit and construction, making revisions and approving the final version.
The sample brings together the design concept and technical specifications in a physical garment. It allows a founder to assess whether the product is ready to move forward into clothing production.
Before giving approval, review these 10 areas carefully.
1. Check the Overall Design and Appearance
Start by comparing the clothing sample with your approved sketch, design concept, and product specifications. Carefully examine the overall silhouette, shape and proportions, neckline, sleeves, pockets, panels, closures, decorative details, and the placement of design features.
A garment can look broadly correct while still having small differences that affect the final appearance. Make sure the sample reflects the design you actually approved.
2. Check Measurements and Fit
Never rely only on how the sample looks on a table or mannequin. Compare its measurements against the approved measurement chart.
Depending on the garment, check: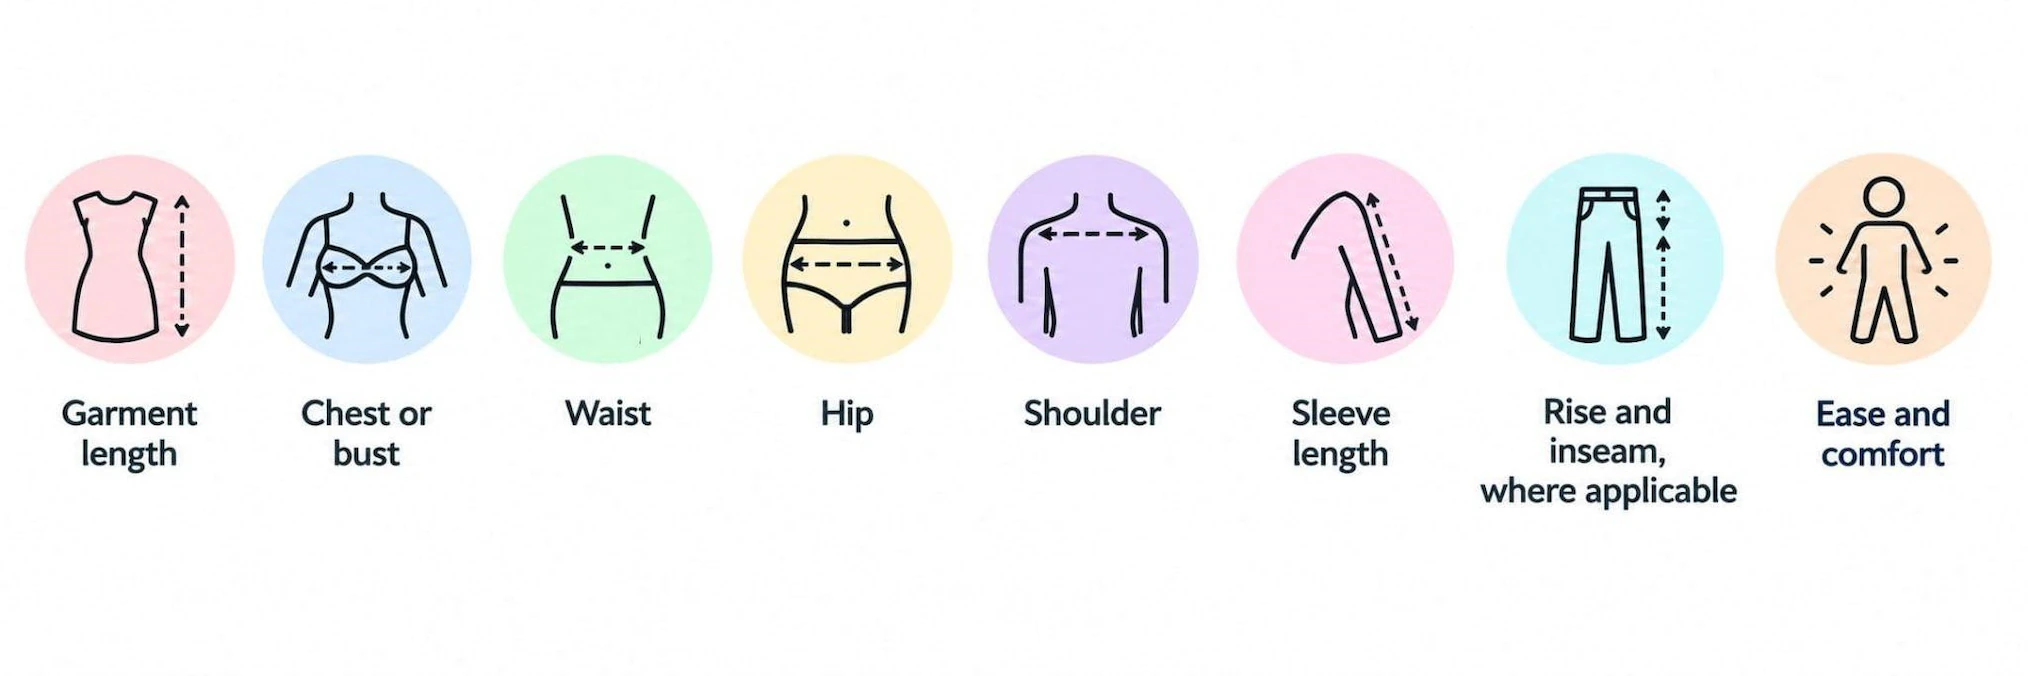
A proper fitting review can reveal issues that are not obvious from measurements alone. Ideally, the sample should be assessed on an appropriate fit model to understand how it sits and moves on the body.
3. Evaluate the Fabric and Material
The fabric can significantly influence the appearance, comfort and performance of a garment.
Check whether the sample uses the agreed material and review:
- Fabric composition
- Weight or GSM, where relevant
- Hand feel
- Stretch and recovery
- Drape
- Opacity
- Texture
- Colour
- Shrinkage considerations
- Washing performance, where applicable
A sample made with a different fabric may not accurately represent the intended final product. Confirm that the material matches the approved specification before proceeding.
4. Inspect Stitching and Construction Quality
The next step is to examine how the garment has been constructed. Check for consistent stitching, good seam quality, appropriate seam allowances, durable thread quality, and reinforcement at stress points. Also, ensure proper panel alignment and clean joining of components, while looking for issues such as puckering, loose threads, weak construction, or uneven stitching.
These details matter because construction problems identified during garment sampling are generally easier to address before bulk production begins.
5. Check Trims, Closures and Accessories
Small components can have a major impact on the finished garment.
Review buttons, zippers, hooks, snaps, labels, drawstrings, buckles, elastic and embellishments.
Check each trim for:
- Appearance
- Size
- Colour
- Placement
- Functionality
- Compatibility with the garment
For example, a zipper may look correct but still need to be checked for smooth operation. Similarly, buttons should be properly positioned and securely attached.
6. Test Comfort and Functionality
A garment can look visually accurate and still fail when worn. Depending on the product category, assess its ease of movement, comfort, closure functionality, pocket usability, sleeve movement, fabric behaviour, garment balance, and overall wearability.
Consider how the garment behaves during normal movement rather than evaluating it only while standing still. The level of testing required will depend on the garment and its intended use.
7. Check Colour, Prints and Design Placement
Compare the sample against your approved colour and design references.
Review:
- Main garment colour
- Contrast colours
- Prints
- Embroidery
- Graphics
- Labels
- Logos
- Motifs
- Placement and scale
Pay particular attention to whether graphics, embroidery or motifs are positioned correctly. Where applicable, use the approved project references rather than relying on memory or verbal descriptions.
8. Review Finishing and Presentation
Finishing details can influence how professional and polished a garment looks. Inspect the pressing, hems, thread trimming, edge finishing, seam finishing, wrinkle appearance, cleanliness, and overall presentation of the sample.
The sample should represent the expected production quality as closely as possible. If the sample has unfinished or inconsistent details, clarify whether they are intentional or need correction before approval.
9. Compare the Sample Against the Tech Pack
Your original sketch is not the only reference point. The tech pack and approved specifications should also be checked against the physical garment.
Review:
- Measurements
- Construction details
- Fabric
- Colours
- Trims
- Stitching requirements
- Labels
- Artwork
- Finishing instructions
A tech pack provides a structured reference for the product. Comparing it with the sample can help identify discrepancies between the intended design and what has actually been developed.
10. Document Revisions Before Approval
If something is wrong, avoid giving vague feedback such as “make it better” or “the fit doesn’t look right.” Clearly document what is incorrect, what needs to change, the relevant measurement or specification, any useful visual reference, the required revision, and the approval status.
There is an important difference between sample approval and approval with revisions. If changes are required, make sure the revised specifications are clearly communicated and reviewed before bulk manufacturing begins.
Garment Sample Approval Checklist
Save this checklist before approving your next sample:
- Design matches the approved concept
- Measurements are correct
- Fit has been reviewed
- Fabric matches the specification
- Stitching and construction are acceptable
- Trims and closures are correct
- Colour and print placement are approved
- Garment is comfortable and functional
- Finishing quality is acceptable
- Sample matches the tech pack
- Required revisions are documented
- Final approval has been clearly communicated
Don’t Rush Sample Approval
Fashion sampling exists to catch and correct issues before they carry into bulk production. Depending on the garment, manufacturer and project, sampling can involve multiple rounds of development and revisions this is also why many brands prefer working with small-batch manufacturing partners rather than committing to large runs before the process is proven.
Approving an incorrect sample can lead to incorrect fit, inconsistent measurements, construction problems, material issues, unwanted design variations, production delays, and additional revisions or costs.
Taking the time to properly evaluate the sample gives everyone involved a clearer production reference.
For fashion founders who need support with garment development, sourcing, sampling, fitting, revisions and production, The ODD Factory can help navigate the process from design, sourcing, sampling, approval and production. If you’re just starting a fashion brand, it’s worth building this checklist into your process from day one.
Ready to get your next sample right the first time? Get in touch with our team.